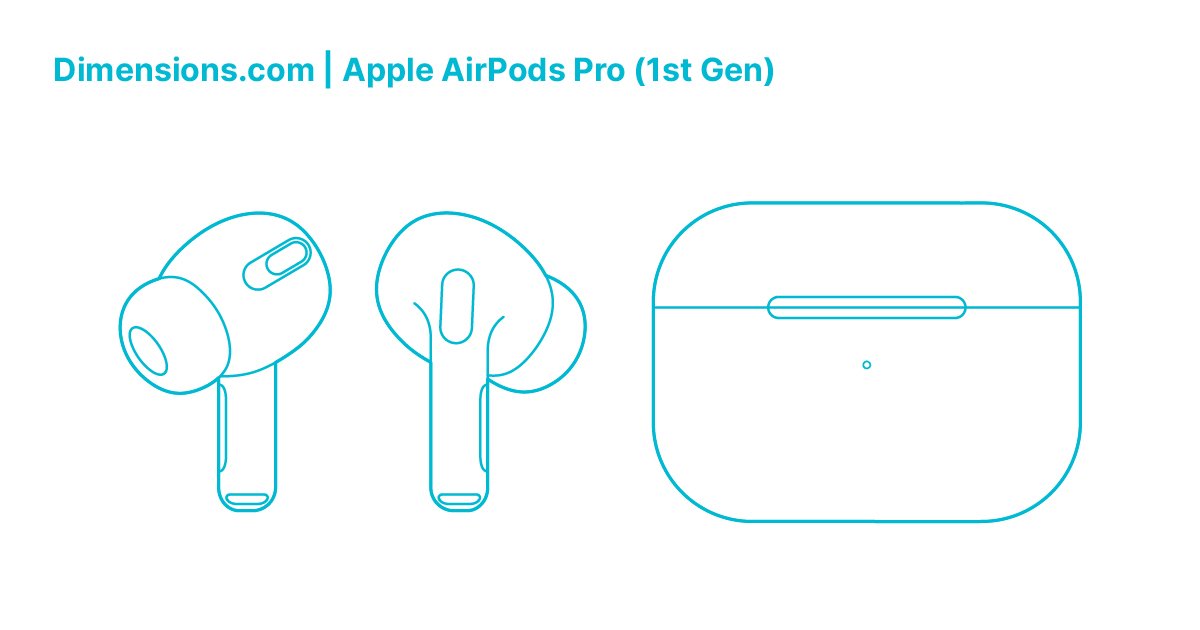
Your AirPods Pro (1st Gen) are more than just earbuds; they're a gateway to a personalized audio experience. But are you truly unlocking their full potential? From fit to firmware, subtle tweaks can dramatically improve everything from active noise cancellation to raw sound quality. This guide will walk you through precisely how to achieve the best possible audio from your original AirPods Pro, transforming your everyday listening into something truly exceptional.
At a Glance: Key Steps to Boost Your AirPods Pro
- Perfect Your Fit: Use the Ear Tip Fit Test for a snug seal; it’s crucial for ANC and bass.
- Stay Updated: Ensure your AirPods firmware is always current.
- Customize Your EQ: Use Headphone Accommodations for a sound profile tailored to your hearing.
- Experiment with Noise Control: Sometimes, turning ANC off can improve raw audio fidelity.
- Clean Regularly: Earwax buildup is the enemy of good sound and effective ANC.
- Monitor Battery: Low charge can subtly degrade performance.
The Foundation: A Flawless Fit is Non-Negotiable
Think of your AirPods Pro as tiny speakers for your ears. Just like a good subwoofer needs an enclosed space to deliver powerful bass, your AirPods Pro need a snug, sealed fit to perform at their best. This isn't just about comfort; it's the absolute bedrock for effective Active Noise Cancellation (ANC) and rich, full-bodied sound quality. Without a proper seal, noise leaks in, bass leaks out, and ANC struggles to work its magic.
Your AirPods Pro come with small, medium, and large silicone ear tips, but finding the right size for each ear is key – they might not be symmetrical!
How to Ensure a Perfect Seal: The Ear Tip Fit Test
- Access the Test: Grab your iPhone. Go to
Settings > Bluetooth, tap the small "i" icon next to your connected AirPods Pro. - Run the Test: Scroll down and tap "Ear Tip Fit Test."
- Position and Play: Place both AirPods firmly in your ears. Tap "Play."
- Evaluate Results: The test will analyze the seal. You're looking for a "Good Seal" confirmation for both ears. If it suggests "Adjust AirPod" or "Try a different ear tip," don't ignore it.
- Try Different Sizes: Experiment with the other ear tip sizes. Don't hesitate to use a medium in one ear and a large in the other, for example. Your ears are unique!
- Re-adjust: Sometimes, simply pushing the AirPod slightly deeper or adjusting its angle can create the necessary seal.
A proper seal can actually boost your ANC performance by a significant margin, up to 30% according to some reports, by physically blocking more external sound before the digital cancellation even begins.
Maintain Your Fit: The Cleaning Regimen
Earwax is a natural, necessary bodily function, but it's also a silent killer of your AirPods' performance. Buildup on the ear tips or, worse, in the speaker grilles, can severely degrade sound quality and reduce ANC effectiveness.
- Weekly Wipe-Down: Gently wipe your ear tips with a soft, dry, lint-free cloth. For more stubborn grime, slightly dampen the cloth with water (avoiding the speaker mesh).
- Gentle Grille Cleaning: If you see wax in the speaker grilles, use a clean, dry cotton swab with a very light touch, or a soft-bristled toothbrush to brush it away. Never use sharp objects or excessive liquid.
Upgrade Your Seal: Memory Foam Ear Tips
If you struggle to get a consistent "Good Seal" with the included silicone tips, or simply want an even more secure fit and potentially better bass, consider third-party memory foam ear tips. These expand to conform to your ear canal, often creating a superior, more personalized seal and enhancing passive noise isolation.
Mastering Noise Control Modes
Your AirPods Pro (1st Gen) offer three core noise control modes: Active Noise Cancellation (ANC), Transparency, and Off. Understanding when and how to use each is paramount to optimizing your listening experience. While AirPods Pro 2's advanced features include Adaptive Audio and Conversation Awareness, your 1st Gen still offers powerful control.
The Three Modes Explained
- Active Noise Cancellation (ANC): This is where your AirPods Pro truly shine. Tiny microphones listen to external sounds, and the AirPods then generate an "anti-noise" wave that cancels out those sounds before they reach your ear. Ideal for noisy commutes, open offices, or whenever you need peace and quiet.
- Transparency Mode: Instead of blocking sound, Transparency mode uses the external microphones to let sound in, subtly amplifying it so you can hear your surroundings naturally. Perfect for walking in the city, listening for announcements, or having a quick chat without removing your earbuds.
- Off: This mode disables both ANC and Transparency, making your AirPods function like standard earbuds. Sound still passes through passively, but there's no active processing.
Switching Between Modes
There are a couple of intuitive ways to cycle through these modes:
- Force Sensor: The easiest way is directly on the AirPods. Press and hold the force sensor (the flat stem) on either AirPod until you hear a chime and the mode changes.
- Control Center (iPhone/iPad): Open Control Center (swipe down from the top-right corner on Face ID iPhones, or up from the bottom on Touch ID iPhones). Press and hold the volume slider. At the bottom, you'll see "Noise Control" options to tap between ANC, Transparency, and Off.
Customizing Your Cycle
You can tailor which modes your force sensor cycles through, making it quicker to get to your preferred settings.
- Go to
iPhone Settings > Bluetooth. - Tap the "i" icon next to your AirPods Pro.
- Under "Press and Hold AirPods," select either the Left or Right AirPod.
- Choose "Noise Control" and then select which two or three modes you want to cycle between. For instance, if you rarely use "Off," you can remove it from the cycle.
When to Use Each Mode for Optimal Experience
- ANC: Best for low-frequency, constant noise (plane engines, hum of an AC unit). It excels at dampening these sounds. For higher-frequency or sudden noises (chattering voices, car horns), it reduces them but won't make them vanish entirely.
- Transparency: Use it when situational awareness is critical. It sounds remarkably natural, almost as if you're not wearing earbuds at all, which is perfect for safety outdoors or interacting with people.
- Off: This mode can be beneficial if you're in a quiet environment and want to conserve a bit of battery, or if you find the subtle processing of ANC or Transparency introduces any audio artifacts that you prefer to avoid.
Elevating Your Sound: Customization & Quality
Beyond noise control, your AirPods Pro (1st Gen) offer a surprising depth of customization to truly tailor your audio experience. Getting this right can make a world of difference. For deeper dives into your device, check out the Original AirPod Pro details.
Keep Your Firmware Fresh
Apple regularly releases firmware updates for AirPods that improve performance, fix bugs, and sometimes even introduce new features. Ensuring your AirPods Pro are on the latest firmware is a foundational step for optimal performance.
- Automatic Updates: Usually, your AirPods Pro update themselves automatically when they're in their charging case, the case is plugged into power, and your iPhone is nearby and connected to the internet.
- Force Update (If Needed): If you suspect you're behind, try placing your AirPods in their case, closing the lid, plugging the case into power, and keeping your iPhone close by and connected to Wi-Fi. This typically triggers an update within an hour or so.
- Check Firmware Version: To confirm your firmware version, go to
Settings > Bluetooth, tap the "i" icon next to your AirPods Pro, and look for "Firmware Version."
The Noise Control Trade-Off: ANC vs. Raw Audio
While ANC is fantastic for silencing your environment, the digital processing involved can sometimes introduce subtle changes to the raw audio quality. Apple's Adaptive EQ, which constantly adjusts the sound 200 times per second to account for the ANC seal, is excellent but can, for some discerning listeners, lead to minor audio artifacts or a less "pure" sound.
- Experiment: Try listening to your favorite tracks with ANC on, then switch to "Off" or "Transparency" mode. You might notice a subtle difference in clarity, bass response, or soundstage.
- Situational Use: If you're in a truly quiet environment, consider turning Noise Control "Off" to see if you prefer the untainted audio. This is a personal preference, so trust your ears.
Headphone Accommodations: Tailoring EQ to Your Ears
This is arguably the most powerful yet underutilized feature for customizing your AirPods Pro's sound. Headphone Accommodations allows you to fine-tune the equalizer (EQ) to compensate for individual hearing sensitivities, making audio clearer and more detailed for your specific hearing profile. It's like a personalized hearing aid for your music.
- Enable It: Go to
Settings > Accessibility > Audio & Visual > Headphone Accommodations. Toggle it "On." - Choose a Preset:
- Tune Audio For: Select "Balanced Tone," "Vocal Range," or "Brightness" based on your preference. "Vocal Range" can make dialogue clearer in podcasts and movies, while "Brightness" enhances high frequencies.
- Mild, Moderate, Strong: Adjust the intensity of the chosen preset.
- Custom Audio Setup (Recommended): For the absolute best results, tap "Custom Audio Setup." This will guide you through a short hearing test, playing various tones and sounds. Based on your responses, your iPhone will create an "Audiogram"-based EQ profile specifically for your ears. This takes a few minutes but can dramatically improve clarity and detail.
- Pro Tip: Perform the "Custom Audio Setup" in a quiet room for the most accurate results. It's a game-changer for many users and taps into iPhone's robust accessibility options.
Navigating Spatial Audio
Spatial Audio creates an immersive, theater-like experience by making sound appear to come from all around you, even with virtual head tracking that keeps the soundstage fixed to your device as you move your head.
- Enable and Personalize:
- Go to
Settings > Your AirPods (just below your Apple ID) > Spatial Audio. - Tap "Personalized Spatial Audio" and follow the prompts to scan your ears and face using your iPhone's TrueDepth camera. This creates a more precise 3D audio map for you.
- When to Use It: Spatial Audio truly shines for movies, TV shows, and supported music tracks (e.g., Apple Music with Dolby Atmos) where it can create a compelling, multi-dimensional soundstage.
- Potential Downside for Music: For some music genres or personal preferences, the dynamic head tracking can make the sound feel distant or even muddy, especially if you're just trying to enjoy a stereo track.
- Adjust or Disable:
- Open Control Center.
- Long-press the volume bar.
- Tap the "Spatial Audio" icon (it looks like a head with sound waves around it) to toggle between "Off," "Fixed," or "Head Tracked."
- "Fixed": This disables dynamic head tracking but keeps the Spatial Audio effect. This can be a good middle ground for music, as the soundstage remains fixed relative to your head.
- "Off": This returns to standard stereo playback.
- Important Note: Features like "Conversation Awareness" which automatically lower volume and emphasize voices, are exclusive to AirPods Pro 2. If you're a 1st Gen user, you won't find this setting and don't need to worry about it impacting your music.
Music App EQ: Fine-Tuning Within Your Streamer
Many music streaming apps include their own built-in equalizers. While Headphone Accommodations provides a system-wide EQ, the app-specific EQ can offer another layer of customization, especially if you want to emphasize certain frequencies for specific genres.
- Spotify:
- Open Spotify.
- Go to
Settings > Playback > Equalizer. - Choose from various presets (e.g., "Bass Booster," "Vocal," "Small Speakers") or manually adjust the sliders.
- Apple Music:
- Go to
iPhone Settings > Music > EQ. - Select from a wide range of presets (e.g., "Bass Booster," "Treble Booster," "Flat," "Rock").
Boosting Streaming Quality: Maximize Your Source
Your AirPods Pro can only sound as good as the audio file they're receiving. Streaming music at higher quality settings makes a noticeable difference, especially for critical listening.
- Spotify Premium:
- Open Spotify.
- Go to
Settings > Audio Quality. - Under "Streaming," select "High" or "Very High" (for Premium subscribers).
- Apple Music:
- Go to
iPhone Settings > Music > Audio Quality. - Under "Cellular Streaming" and/or "Wi-Fi Streaming," select "High Quality."
- A Note on Lossless: While Apple Music offers Lossless Audio, current Bluetooth technology (including that in your AirPods Pro 1st Gen) compresses audio before transmission. This means your AirPods Pro cannot wirelessly take advantage of true Lossless playback. You'll still get high-quality audio, but not the uncompressed fidelity of a wired connection.
Charged Up, Tuned In
It might sound obvious, but low battery can sometimes lead to degraded audio performance. While not a dramatic drop, a very low charge state might cause the AirPods' internal processing to slightly reduce its demands to conserve power.
- Keep Them Charged: Make a habit of topping up your AirPods Pro.
- Check Battery:
- Open your AirPods Pro case near your iPhone (with AirPods inside). A pop-up will show battery levels.
- Add the "Batteries" widget to your iPhone's Home Screen or Today View for a persistent overview.
- The charging case LED: Amber means charging or less than one full charge remaining for the AirPods; green means fully charged or more than one full charge remaining.
Beyond the Basics: Advanced Tips & Troubleshooting
Even with the right fit and settings, occasional issues can arise. Knowing how to troubleshoot and leverage specific features can save you a lot of frustration.
ANC on One AirPod: A Unique Accessibility Feature
Sometimes you need noise cancellation in just one ear, perhaps to block out a distracting coworker while still being aware of your phone ringing. Your AirPods Pro (1st Gen) support this, a feature not common among other top-tier wireless earbuds.
- Go to
iPhone Settings > Accessibility > AirPods. - Toggle on "Noise Cancellation with One AirPod."
- Now, you can use the force sensor on a single AirPod to cycle through ANC, Transparency, and Off, even with the other AirPod in its case. This requires iOS 19 or later.
When ANC Feels Off: Troubleshooting Steps
If you feel your Active Noise Cancellation isn't performing as it should, or if you notice strange static or crackling, here's a systematic approach:
- Verify Ear Tip Fit: Re-run the "Ear Tip Fit Test" (as described above). A poor seal is the most common culprit for underperforming ANC.
- Clean Ear Tips and Sensors: Ensure there's no earwax or debris blocking the speaker grilles or the tiny external microphones responsible for ANC. Gently clean them as detailed earlier.
- Check Firmware: Confirm your AirPods Pro are running the latest firmware. (See "Keep Your Firmware Fresh" section). How AirPods firmware updates work can sometimes be confusing, but patience usually pays off.
- Reset Your AirPods Pro: This often resolves minor software glitches.
- Place both AirPods in their charging case and close the lid.
- Wait 30 seconds.
- Open the lid and, with your iPhone nearby, press and hold the setup button on the back of the case until the LED light flashes amber, then white.
- Re-pair your AirPods Pro to your iPhone via Bluetooth.
- Test Other Devices: Try pairing your AirPods Pro with a different Apple device (if available) to see if the issue persists. This helps determine if the problem is with the AirPods themselves or your primary device.
- Contact Apple Support: If issues persist despite these steps, especially persistent crackling, static, or ANC not working, it's worth contacting Apple Support. There was a service program for some original AirPods Pro units manufactured before October 2020 that experienced sound issues (crackling or ANC problems). Your unit might qualify for a free repair or replacement. This is especially relevant if you're experiencing common AirPods connectivity issues alongside the ANC problems.
AirPods Pro 1st Gen in Context: What About the Competition?
While newer models and competitors have entered the market, your 1st Gen AirPods Pro still hold their own, especially within the Apple ecosystem.
- AirPods Pro 1st Gen vs. Sony WF-1000XM5:
- Apple Ecosystem Integration: AirPods Pro offer unparalleled seamless switching between Apple devices, "Hey Siri" functionality, and deep integration with iOS features like Headphone Accommodations and Personalized Spatial Audio.
- Single-Ear ANC: A significant advantage for the AirPods Pro, allowing noise cancellation with just one earbud.
- Battery Life: The Sony WF-1000XM5 typically boasts better battery life on a single charge (around 8 hours vs. 6 hours for AirPods Pro 1st Gen).
- Cross-Platform Compatibility: Sony earbuds generally offer a more feature-rich experience when paired with Android devices, whereas many AirPods Pro advanced features are Apple-exclusive.
- Sound Profile: Many audiophiles prefer the Sony's warmer, more customizable sound profile out of the box, though AirPods Pro can be significantly improved with Headphone Accommodations.
Your Path to Peak Performance
Optimizing your AirPods Pro (1st Gen) isn't a one-time setup; it's an ongoing process of ensuring a great fit, staying updated, and leveraging the powerful customization options Apple has built into iOS. By meticulously working through these steps, you'll rediscover the incredible audio capabilities of your original AirPods Pro. Don't settle for "good enough" sound when truly exceptional is just a few taps away. Dive into your settings, experiment, and enjoy a truly personalized listening experience.